The following tutorial drives through getting started with Windows IoT on a Raspberry pi 3.
Equipment needed:
Equipment needed:
- Raspberry pi 3.
- Adapter.
- Memory card.
- Card reader.
- Led,resistor and connecting jumper cables.
In this tutorial we will run Hello, blinky using Windows IoT and Raspberry pi3.
- First go to https://developer.microsoft.com/en-us/windows/iot and select getting started . It will redirect you to another page .Here we have to select the device, in our case "Raspberry pi 3".

- Select install on to my blank sd card.

- Then select the OS as Windows 10 IoT core. Click Next.


- This will launch you on another page from where we get Windows 10 IoT dashboard. Download and install the dashboard.

- Connect the card reader to the computer and open the dashboard. Go to set up my device and select raspberry pi3.
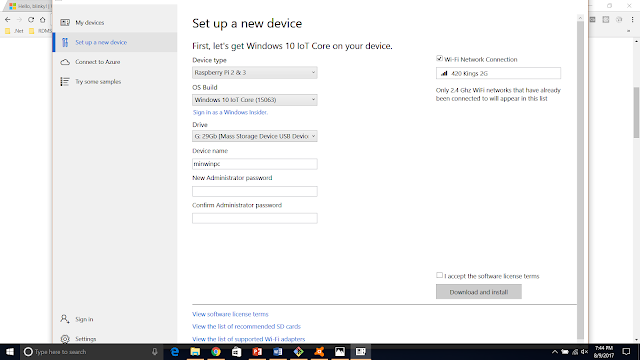
- Make sure you select the wifi on the right hand side and setup device name and password .
- After this check I accept and press on download and install. This takes a while and after the installation place the sd card on the board and power it on.
- The initial boot takes some time and on the dashboard go to my devices, there you will find the board.

- Download and install visual studio if you dont have one.
- Go to https://github.com/ms-iot/samples and clone the repository. This contains a bunch of samples we can run .
- Set up the led and resistor on the breadboard as shown below.

- After that based on the picture below use the white jumper cable at pin 1 (3.3W power) and black jumper cable at pin 29 (gpoi 5).
 Place the pin1 jumper cable other end at the resistor and pin 29 jumper cable other end at led .
- Open hello blinky solution in the visual studio. Go to properties of the project and select debug and click on find remote machine. You should see the raspberry pi 3, select it and save it .


- Then click on remote machine to run the program, it would take a while to deploy and then you can see the led blinking.

- The output should look like this, a blinking led.


No comments:
Post a Comment